
TL;DR
Moving your rig into a closet or small enclosed space can drastically reduce noise and echo—if you handle placement, sealing, and ventilation right. Foam alone won’t cut it; strategic placement and sealing are key for real results.
Ever tried recording in a tiny closet? It’s a game-changer—small spaces naturally cut down echo and reverb, giving you crisp vocals and clean sound. But the trick isn’t just tossing foam on the walls; it’s about smart placement, sealing gaps, and managing heat.
This guide reveals how to turn your closet into a quiet, effective workspace—without sacrificing comfort or blowing your budget. Whether you’re recording vocals, running AI rigs, or just need a calmer environment, understanding the real science behind sound control makes all the difference.
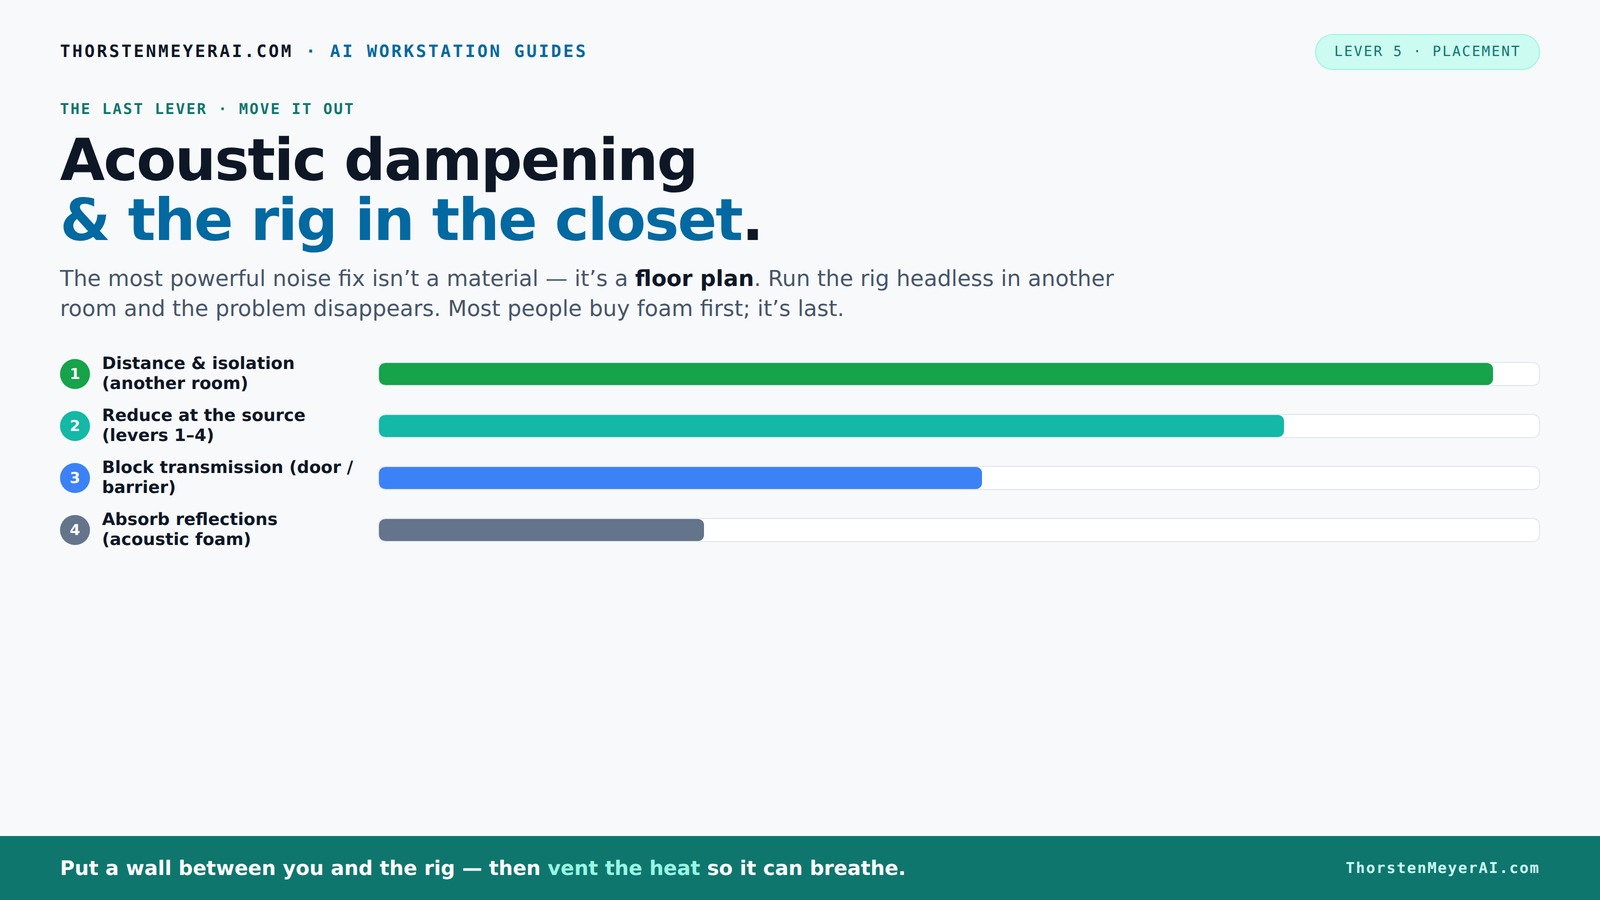
Acoustic dampening
& the rig in the closet.
The most powerful noise fix isn’t a material — it’s a floor plan. A rig you can’t hear because it’s in another room beats any amount of foam. Tap the approaches in Part 1 to see what actually works.
(another room)
(levers 1–4)
(door / barrier)
(acoustic foam)
Contain the noise, not the heat
Key Takeaways
- Moving your rig into another room or closet drastically cuts noise, often more than any foam treatment.
- Ventilation is non-negotiable—sealed closets need active airflow to prevent overheating.
- Placement of absorptive material at reflection points and corners yields the best sound improvements.
- Sealing gaps around doors and vents prevents sound leaks that foam alone can’t block.
- Coverage matters, but strategic placement beats filling every inch with foam. Focus on critical reflection points.
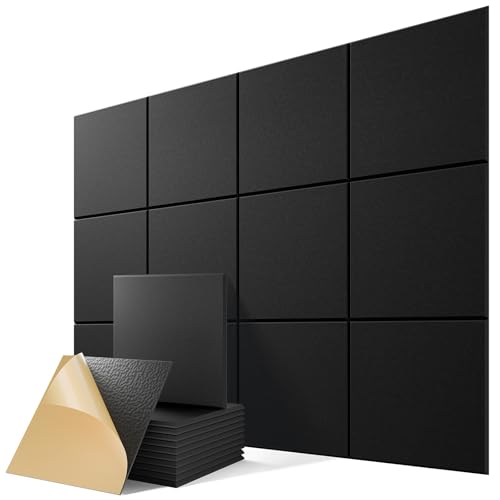
12 Pack Self-Adhesive Acoustic Panels, 12" X 12" X 0.4" High-Density Polyester Sound Proof Foam Panels for Walls, Soundproof Wall Panels for Home & Office (Black)
Superior Noise Reduction & Echo Cancellation - Tired of background noise and poor acoustics? Our soundproof wall panels...
As an affiliate, we earn on qualifying purchases.
As an affiliate, we earn on qualifying purchases.
Why Moving Your Rig Is the Best Noise Solution
Placing your noisy rig in a different room beats any foam or barrier. A closet or basement, where you don’t spend your workday, is a goldmine for noise reduction. Since most AI work is done remotely, your computer can roar away in another space. All you need is a good network connection and proper ventilation.
Imagine your GPU rig in a closet across the hall—silent for your work, but still accessible over Wi-Fi or Ethernet. The noise? It’s out of your hair, and your workspace stays peaceful. This simple step beats stacking foam or soundproofing a wall, hands down.

Focusound 52 Pack Acoustic Foam Panels 1" x 12" x 12" Sound Proof Foam Panles Soundproofing Noise Cancelling Wedge Panels for Home Office Recoding Studio with 300PCS Double-Side Adhesive
Soundproofing - Acoustic foam panels triangular grooves structure for better noise absorption, helps to reduce and absorb unwanted...
As an affiliate, we earn on qualifying purchases.
As an affiliate, we earn on qualifying purchases.
The 'Rig in the Closet' Setup — What Works and What Doesn’t
Putting a high-power machine in a closet can be quiet and cool—if you handle heat right. The key is ventilation. A sealed closet traps heat, causing temperatures to spike and fans to scream. That defeats the purpose.
Use passive vents, exhaust fans, or a purpose-built soundproof cabinet with airflow management. For example, a small, quiet exhaust fan can keep your GPU cool and let hot air escape. Without proper ventilation, your rig risks overheating and throttling, which kills performance and increases noise.
Learn more about best practices for cooling and sealing at this guide.

Audimute Soundproofing Acoustic Door Seal Kit - Door Sweep and Seal - (Standard Size)
Includes a Door Seal (3/16" x 1/2" x 25') and a Door Sweep (1/2" x 1.5" x 4').
As an affiliate, we earn on qualifying purchases.
As an affiliate, we earn on qualifying purchases.
Acoustic Dampening vs. Soundproofing: What Really Matters
Acoustic dampening inside your closet reduces echo and reflections—making your recordings clearer. Soundproofing blocks sound from escaping or entering, stopping noise leaks. The two work hand-in-hand but serve different purposes.
For instance, foam panels absorb sound waves bouncing inside your closet, preventing a boxy, echoey vibe. Sealing gaps around the door with weatherstripping or acoustic sealant prevents sound from leaking out—crucial if your neighbors or adjacent rooms pick up your noise. Learn more about acoustic dampening techniques.
Remember: foam doesn’t stop sound from passing through walls or doors. To truly soundproof, you need mass, sealing, and sometimes even a double wall.
Understanding these differences helps you prioritize your efforts. If your goal is to contain noise within your space, focus on sealing gaps and adding mass around the enclosure. If you want clearer recordings, invest in absorption materials at reflection points. Both are essential but serve different roles, and balancing them depends on your specific needs and constraints.
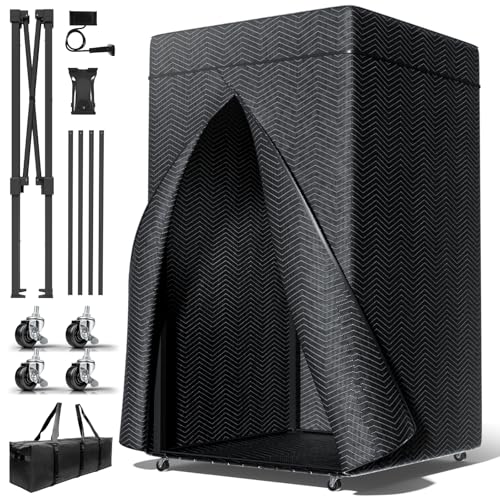
RDCMKL XL Portable Recording Booth, Complete Home Recording Studio Soundproof Vocal Booth, Foldable with Travel Bag for Echo-Free Studio-Quality Sound, Ideal for Voiceovers, Podcasts, and Music
Transform your home studio with our complete home recording studio. This vocal booth offers clear, high-quality audio for...
As an affiliate, we earn on qualifying purchases.
As an affiliate, we earn on qualifying purchases.
Placement Secrets: Where to Put Absorption for Best Results
Placement is everything in small spaces. Start with the microphone. Position it away from reflective walls and in a spot where it won’t pick up echo. Use a reflection filter or a shield to block sound bouncing back from walls. For more on microphone placement, visit interior design and home decor ideas.
Surround the mic with absorption on the walls behind it, on the ceiling, and even on the door if it’s close. Place bass traps in corners where low-end buildup can turn your voice into a boomy mess. Cover more than just corners—broader wall coverage beats gimmicks.
For example, a DIY setup with blankets on the wall behind the mic, foam panels on side walls, and a thick rug on the floor can dramatically improve clarity.
Strategic placement of these materials is crucial because it directly influences how sound waves interact within your space. Proper placement ensures that reflections are minimized at the source, providing a cleaner recording and reducing the need for excessive treatment elsewhere. Think of it as guiding sound waves away from problematic reflections rather than trying to fix them after they bounce around.
How to Seal a Closet Like a Pro
The biggest sound leaks come from gaps around doors and vents. Seal these first. Use weatherstripping to close gaps around the door frame. Add a heavy blanket or acoustic curtain over the door for extra absorption and blocking.
For vents, install acoustic foam panels or ducting that directs airflow while muffling sound. A well-sealed closet prevents noise from escaping and reduces echo within.
For example, a DIY musician taped moving blankets over the door, sealed gaps with weatherstripping, and added a vent cover made of acoustic foam, turning a noisy closet into a quiet booth.
Sealing is about creating a barrier that prevents sound from leaking out and prevents external noise from coming in. Gaps around vents, doors, and any penetrations compromise your efforts. Using proper sealing materials and techniques ensures your treatment works as intended, making your small space significantly quieter and more controlled. Find out more about sealing techniques.
How Much Coverage Do You Really Need?
More coverage usually means better sound. But don’t just fill the space with foam chunks. Focus on treating the reflection points—behind the mic, side walls, ceiling, and corners. Covering 20-30% of the wall area with dense panels and bass traps can make a big difference.
Experts recommend treating at least the first reflection points and corners. A good rule of thumb: aim for 50-60% coverage of the critical surfaces for a noticeable improvement.
In DIY setups, using thick blankets, curtains, and foam strategically on key surfaces often beats filling every inch with foam. It’s about smart placement, not sheer volume.
Understanding where to place treatment and how much coverage is enough is crucial. Over-treating can be unnecessary and costly, while under-treating leaves you with poor sound. Focus on the most impactful areas—reflection points and corners—for the best results with minimal material. For tips on placement, see placement secrets.
Common Mistakes That Sabotage Your Closet Soundproofing
Overusing foam, ignoring gaps, and placing the mic too close to reflective surfaces are the usual culprits. Foam alone won’t block sound or fix low-end buildup. Gaps around doors and vents can leak sound, defeating your efforts.
Don’t forget: the door is often the weakest link. Seal it well with weatherstripping or a blanket. Keep the mic at least a few inches away from reflective surfaces to avoid echoes.
For example, many DIYers hang blankets over the door, but forget to seal gaps, causing sound leaks. Small tweaks like sealing gaps and proper mic placement make a huge difference.
Remember: effective soundproofing requires a holistic approach. Relying solely on foam or neglecting leaks can lead to persistent noise issues. Always check for gaps, weak points, and reflective surfaces, then address them systematically for best results.
Troubleshooting: When Your Closet Sounds Boxy or Boomy
If your recordings sound hollow or bass-heavy, you’re likely dealing with standing waves or low-frequency buildup. Use bass traps in corners and thicker panels on the ceiling and walls to tame these issues.
Adding a rug or soft surface beneath the mic can reduce floor reflections. Adjust mic placement—moving it slightly away from reflective surfaces can help.
For example, a home musician added bass traps in corners and a thick blanket on the ceiling. The result? Clearer vocals with tight bass and no more boomy echoes.
Addressing these issues often involves identifying the specific problematic frequencies and treating those areas. Using measurement tools or simply listening carefully can help you pinpoint the source of boominess. Once identified, targeted treatment—like bass traps—can dramatically improve your sound clarity and balance, making your small space much more studio-like.
Frequently Asked Questions
Will foam panels actually soundproof my closet?
Foam panels mainly absorb sound reflections inside your closet—they don’t block sound from escaping. For true soundproofing, you need sealing, mass, and sometimes a dedicated acoustic door. Foam helps, but it’s not a silver bullet.
Where should I place acoustic panels in a closet booth?
Start with the reflection points—behind the mic, side walls near the source, and the ceiling. Bass traps in corners help control low-end buildup. Covering about 50% of these key areas offers noticeable improvements.
Do I need bass traps in a small booth?
Yes. Small spaces tend to amplify low frequencies, causing boomy sounds. Bass traps in corners are a simple, effective way to tame this low-end buildup and tighten your recordings.
How much wall coverage is enough?
Covering 50-60% of the critical reflection surfaces—walls, ceiling, and corners—generally provides good results. Focus on strategic placement rather than just filling space with foam.
Should I treat the door or the walls first?
The door is usually the weakest leak point. Sealing gaps and adding a blanket or acoustic curtain over it should come first. Walls can be treated afterward for reflection control.
Conclusion
Think of your small space as a blank canvas. With smart placement, sealing, and ventilation, you can turn a cramped closet into a quiet, professional-grade booth. The real secret isn’t just foam — it’s where and how you treat your space.
So, next time you set up your rig, remember: it’s about controlling sound at the source, sealing leaks, and giving your gear room to breathe. Your perfect sound environment is closer than you think.