To transfer images onto wood using the Photo Transfer Magic method, start by selecting a high-contrast photo and printing it on a laser or inkjet printer, flipping the image if needed. Prepare your wood surface by sanding and cleaning it thoroughly. Apply a generous layer of transfer medium to the image, press it face-down onto the wood, and smooth out any bubbles. Once dry, dampen the paper and gently rub away fibers to reveal your personalized design, then seal for lasting beauty. Keep going to learn more detailed tips and tricks.
Key Takeaways
- Choose high-contrast printed images, flip if needed, and ensure they are suitable for transfer onto wood.
- Prepare the wood surface by sanding, cleaning, and optionally sealing for smooth adhesion.
- Apply a generous layer of transfer medium to the image, then press face-down onto the wood, smoothing out bubbles.
- Dampen and gently rub away paper fibers to reveal the transferred image once dry.
- Seal the finished piece with varnish for durability and enhanced visual appeal.

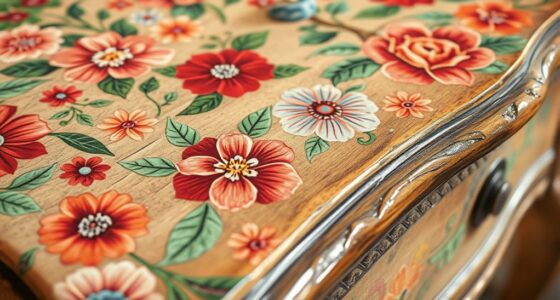
Photo Transfer Magic is a simple and effective way to turn your favorite images into stunning, personalized keepsakes. Whether you want to preserve cherished memories or create unique art pieces, this process allows you to transfer your photos onto wood surfaces with ease. One of the key benefits of this technique is its ability to enhance image preservation, guaranteeing your treasured images stand the test of time. By applying artistic techniques, you can give your projects a professional touch, making each piece truly one-of-a-kind.
To start, you need to select the right image. Opt for a high-contrast photo with clear details to guarantee the best transfer results. Once you’ve chosen your image, print it onto a laser jet or inkjet printer using standard paper. Keep in mind that the image will transfer in reverse, so if it has text or specific orientation, make sure to flip it before printing. This step is vital for maintaining the integrity of your design and achieving a polished final look.
Next, prepare your wood surface. Lightly sand the surface to create a smooth, clean area for the transfer. Wipe away any dust or debris, and if desired, apply a light coat of sealant or primer to help the image adhere better. When you’re ready, apply a generous layer of transfer medium or gel to the printed image. Carefully place the image face-down onto the wood, pressing down gently to eliminate air bubbles and ensure good contact. Use a squeegee or credit card to smooth out any wrinkles, which helps with image preservation by reducing air pockets that could cause uneven transfers. Allow the medium to dry completely according to the manufacturer’s instructions.
Finally, dampen the paper with a damp cloth or sponge and gently rub away the paper fibers, revealing the transferred image underneath. This step requires patience and a gentle touch to avoid damaging the transferred image. Once all the paper is removed, let the piece dry thoroughly. To further enhance image preservation and durability, you can seal the surface with a clear varnish or sealant, which also adds a professional finish. This sealing process not only preserves the transferred image but also protects it from environmental factors that can cause deterioration over time. This sealing layer also helps to prevent potential skin irritation caused by some sealing agents or residual paper fibers, ensuring a safe and lasting finish.
In just a few steps, you transform your favorite images into beautiful, personalized wood keepsakes. By focusing on image preservation and employing artistic techniques, you guarantee your creation remains vibrant and lasting. Whether for gifts, home decor, or keepsakes, this method offers a rewarding way to showcase your photos with a handcrafted touch.

TransOurDream Heat Transfer Paper for Inkjet & LaserJet Printer (10 Sheets 8.5×11", Light 3.0) Printable HTV Heat Transfer Vinyl for T Shirts Iron on Transfers Paper for Light Fabric
💕TRU-LIGHT HEAT TRANSFER PAPER: Compatible with both INKJET & LASER printers, scissors & cutting machine. The printing quality…
As an affiliate, we earn on qualifying purchases.
As an affiliate, we earn on qualifying purchases.
Frequently Asked Questions
Can I Transfer Color Photos Onto Wood?
Yes, you can transfer color photos onto wood, but pay attention to photo paper compatibility. Choose a compatible photo paper designed for transfer, as transfer technique differences matter. Using the right paper guarantees vibrant colors and clear images. Follow specific steps for color photo transfers, adjusting for ink types and paper properties. With proper preparation and technique, your color photos will beautifully transfer onto wood surfaces.
What Types of Wood Are Best for Photo Transfer?
You should choose woods with smooth, tight grain patterns like maple, birch, or pine for photo transfer. These types allow for clearer images and easier preparation. Before transferring, guarantee proper wood preparation by sanding the surface smoothly and removing dust. This helps the image adhere better and reduces imperfections. Avoid woods with rough or uneven grain, which can distort the transferred image and make the process more difficult.
How Long Does the Photo Transfer Process Take?
The transfer duration depends on the method you choose, but generally, it takes about 24 hours to dry completely. After applying the image, you’ll need to allow the transfer to set and dry thoroughly for the best results. Keep in mind, the drying time can vary based on humidity and thickness of the transfer. Patience guarantees your image adheres well and looks its best once finished.
Is Special Sealing Required After Transferring?
After transferring your image, you should consider a sealant application to protect your work. Using a clear sealant helps preserve the transferred image and enhances its durability. It’s a key preservation technique that prevents damage from moisture, sunlight, or handling. Make sure to choose a sealant suitable for wood and follow the instructions carefully, ensuring your artwork stays vibrant and intact over time.
Can I Transfer Images Onto Curved or Uneven Surfaces?
Imagine wrapping a gift around a curve; similarly, transferring images onto curved surfaces requires careful surface preparation and a flexible transfer adhesive. You need to guarantee the surface is smooth and clean, and use an adhesive that can bend with the shape. This approach helps the image stay intact without cracking or peeling, even on uneven or rounded objects. Just like wrapping a gift, patience and the right materials make the transfer successful.

PHOTO PHLATTS Photo Transfer Medium Gel for Transferring Photos to Wood and Other Hard Surfaces | Premium Clear Drying Solution for Beautiful Results on Your DIY Crafts and Personalized Gifts | 8oz
INCLUDES: Detailed, Step by Step Instructions to achieve beautiful results with every transfer.
As an affiliate, we earn on qualifying purchases.
As an affiliate, we earn on qualifying purchases.
Conclusion
As you step back, you’ll notice the image seamlessly blending into the wood, almost as if it was always part of it. That unexpected moment when the photo’s colors and textures merge perfectly feels like magic—like discovering a hidden treasure. With each transfer, you create a unique piece of art, a reminder that sometimes, the smallest steps lead to the most beautiful surprises. So, trust the process and enjoy watching your memories come to life right before your eyes.
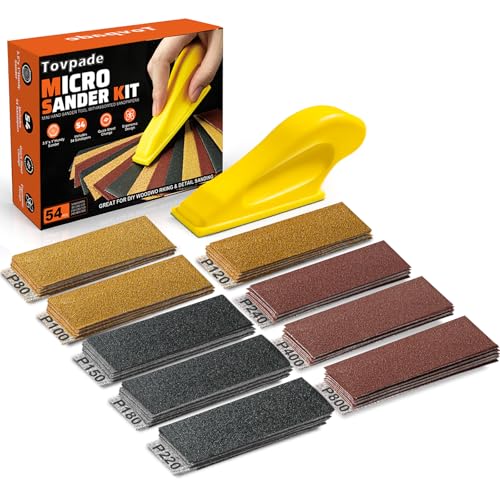
TOVPADE 54PCS Premium Micro Sander, Detail & Mini Sander Block – Precision Small Hand Sanding Tool, 80–800 Grit Sandpaper Kit, 3-in-1 Set for Wood, Crafts, Furniture, Tight Spaces & DIY Projects
All-in-One Sanding Kit for Every Detail: Includes a compact sanding block and 54 sandpapers in 9 grit types…
As an affiliate, we earn on qualifying purchases.
As an affiliate, we earn on qualifying purchases.

8 OZ Gloss Sealer, Glue & Finish, Air Dry Clay Glaze, Clear Decoupage Glue, Waterbase Clay Varnish for DIY Crafts, Wood, Paper, Art Projects, Craft, Painting, Puzzle,Ceramics,Magic Sealant 250 ML
Clear Glossy Finish: Bondtech magic sealant ensures a long-lasting glossy finish, enhances the appearance of the project without…
As an affiliate, we earn on qualifying purchases.
As an affiliate, we earn on qualifying purchases.