
Transforming discarded wood pallets into rustic shelves is a fun and eco-friendly weekend project that boosts your home decor. Start by choosing good condition pallets, carefully dismantling and sanding the wood for a smooth finish, then measuring and cutting it to your desired size. Assemble the shelves with a drill and screws, secure them on the wall, and add any finishes or decorative touches. By upcycling old pallets, you create charming, sustainable storage solutions—dive further to uncover more tips and tricks.
Key Takeaways
- Select quality pallets and dismantle carefully to preserve rustic wood’s natural charm.
- Measure, cut, and assemble wood into desired shelf sizes using eco-friendly finishes.
- Mount shelves securely on the wall with brackets or direct attachment for stability.
- Embrace weathered imperfections to create authentic, charming reclaimed wood shelves.
- Highlight environmental benefits by upcycling discarded pallets into stylish, sustainable decor.

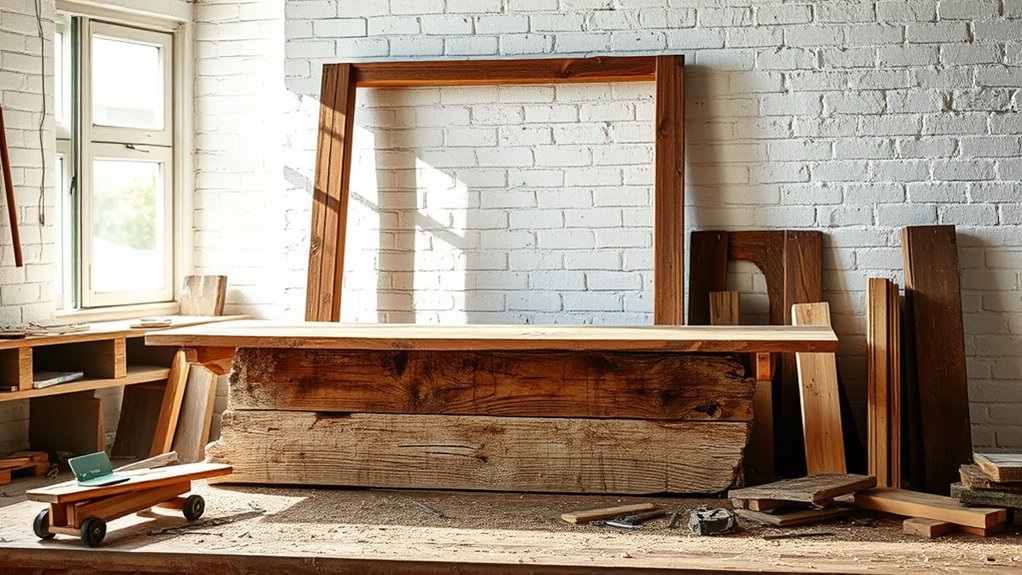
If you’re looking for a fun and productive way to spend your weekend, pallet projects offer a perfect solution. Turning discarded wood into rustic shelves not only gives your space a charming touch but also embraces sustainable woodworking practices. Pallet projects are a fantastic example of upcycling techniques, where you breathe new life into old pallets that might otherwise be thrown away. This approach helps reduce waste and promotes eco-friendly habits, making your project both environmentally and aesthetically rewarding. Research shows that sustainable woodworking can significantly lessen environmental impacts compared to conventional methods, further emphasizing the importance of repurposing materials. Start by selecting pallets that are in decent condition—look for ones with minimal rot or damage. Once you have your pallets, you can begin dismantling them carefully, using a crowbar and hammer to remove nails and separate the slats. During this process, you’ll notice how the wood’s natural imperfections and aged patina contribute to the rustic charm of your shelves. This is where upcycling techniques shine, allowing you to preserve the wood’s character while repurposing it into something functional. Sand the wood thoroughly to smooth rough edges and splinters, but don’t worry about making it perfect. The beauty of rustic shelves lies in their raw, weathered look, which adds warmth and personality to any room. Next, measure and cut your wood to the desired size for your shelves. You can opt for a single long shelf or multiple smaller ones, depending on your space and style preference. Use a sturdy drill and screws to assemble the frame and attach the shelves securely. If you want to add extra stability or decorative touches, consider painting or staining the wood with eco-friendly finishes. These small details can enhance the overall aesthetic without compromising the sustainability of your project. Once assembled, find the perfect spot to hang your new shelves. Mount brackets or directly attach the shelves to the wall, ensuring they’re level and secure. The end result is a set of charming, handcrafted shelves that showcase your upcycling skills and commitment to sustainable woodworking. These shelves aren’t just functional; they serve as a visual reminder of how discarded materials can be transformed into beautiful, useful items. Plus, the process is incredibly satisfying, knowing you’ve reduced waste and created something unique with your own hands. In the end, pallet projects like these demonstrate how upcycling techniques and sustainable woodworking can turn everyday refuse into stylish, eco-friendly decor. With a little effort and creativity, you’ll enjoy a weekend well spent, surrounded by the beauty of reclaimed wood and the satisfaction of creating something truly special.

DIY PALLET WOOD PROJECTS FOR BEGINNERS: Step-by-Step Guides to Rustic Shelves, Tables, and Décor
As an affiliate, we earn on qualifying purchases.
As an affiliate, we earn on qualifying purchases.
Frequently Asked Questions
What Tools Are Necessary for Pallet Shelf Construction?
To build pallet shelves, you’ll need basic tools like a saw, drill, measuring tape, and a level. Start by pallet cleaning to remove dirt and debris. Then, perform wood treatment to make sure it’s safe and durable. A screwdriver, sandpaper, and clamps will help with assembly and finishing touches. These tools make the process easier, allowing you to create sturdy, rustic shelves from discarded wood.
How Do I Choose the Right Wood Pallets?
Perfectly picking pallets prompts practical choices. You’ll want to consider pallet wood types, focusing on sturdy, safe options without chemical treatments. Recycled wood advantages include affordability, eco-friendliness, and unique character. Look for pallets with minimal damage, clear markings, and no signs of mold or pests. Prioritize quality, safety, and sustainability to ensure your project’s success. With thoughtful selection, you turn discarded wood into stunning, rustic shelving that’s both eco-conscious and eye-catching.
Are Pallet Shelves Suitable for Outdoor Use?
You might wonder if pallet shelves are suitable for outdoor use. Their durability depends on the type of wood and treatment, so look for pallets with good outdoor weather resistance. Proper sealing and sealing treatments increase their longevity, making them more resistant to moisture and sun damage. If you choose weather-resistant materials and apply protective finishes, your pallet shelves can withstand outdoor conditions and last for years.
How Can I Finish or Stain Pallet Shelves?
When finishing or staining your pallet shelves, you can explore various finishing techniques like sanding, sealing, and applying a protective coat. For stain options, choose between oil-based, water-based, or gel stains to achieve your desired look. First, sand the wood smoothly, then apply your chosen stain evenly with a brush or cloth. Finish with a clear sealant to enhance durability and bring out the wood’s natural beauty.
What Safety Precautions Should I Take During the Project?
Coincidence often reminds you that safety should never be overlooked. You should always wear safety gear like gloves and goggles to protect against splinters and dust. Stay aware of hazards such as sharp tools or unstable pallets, and keep your workspace tidy to prevent accidents. By maintaining hazard awareness and using proper safety precautions, you guarantee your project stays fun and safe from start to finish.

Industrial Pallet, Black Frame with Metal Mounting Brackets
High precision package
As an affiliate, we earn on qualifying purchases.
As an affiliate, we earn on qualifying purchases.
Conclusion
Now that you’ve transformed old pallets into charming rustic shelves, you’ve unblocked a secret superpower—turning trash into treasure! With just a little effort, you’ve created stunning decor that’ll make your friends think you’ve hired a pro. Keep experimenting with other projects, because if you can craft this masterpiece in a weekend, there’s no limit to what you can achieve. Your home just got a whole lot more stylish—and that’s no small feat!

Furniture Clinic Wood Stain | Natural Oak | Water Based | Fast Drying, Low Odor, & Non-Toxic | for Indoor & Outdoor Furniture and More | Multiple Finishes | (8.5oz / 250ml)
EFFECTIVE ON ALL WOOD SURFACES and QUICK DRYING: Furniture Clinic Wood Stain is a fast drying and highly…
As an affiliate, we earn on qualifying purchases.
As an affiliate, we earn on qualifying purchases.

Swpeet Powerful Speedy Hand Drill 1/4-Inch Capacity with 13Pcs Drill Bit Set, Mini Hand Drill Manual ¼ inch with Finely Cast Steel Double Pinions Design, Chucks and Grip Handle for Woods, Plastics
❤ WHAT YOU GET — A perfect Hand Drill Tool and A Chuck Key, Meanwhile We have prepared…
As an affiliate, we earn on qualifying purchases.
As an affiliate, we earn on qualifying purchases.