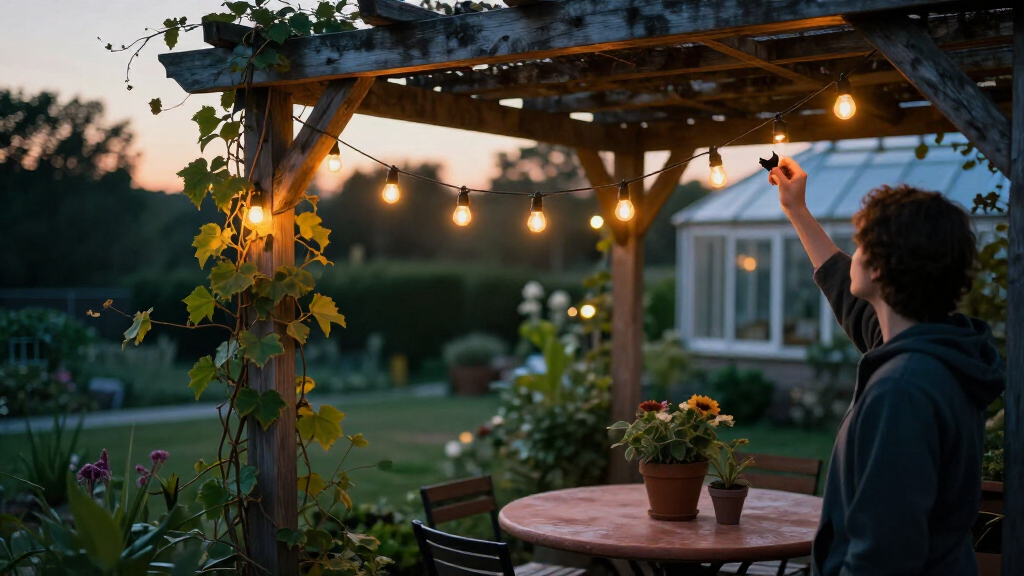

Hang spooky outdoor string lights around a porch, path, fence, or yard using outdoor-rated lights, suitable supports, and a protected power source. This guide is for beginners who want a Halloween display that looks intentional and remains secure in ordinary outdoor conditions. Allow about 1-2 hours, depending on the size of the area and whether you need to install support hooks.

Get garden gear delivered free — and shop member deals
- Fast, free delivery on millions of items
- Access to Prime Big Deal Days deals on October 6–7
- Prime Video, Amazon Music and more included

Brizled 95.14 ft Halloween String Lights, 240 Purple and Orange LEDs
- ✔ Length: 95.14 feet
- ✔ LED count: 240
- ✔ Light colors: Purple and orange

C7 Halloween Flicker Flame String Lights, 25 ft, Black Wire
- ✔ Length: 25 feet
- ✔ Bulbs: 25 C7 LEDs plus 2 spare
- ✔ Bulb base: E12

Large Spider Halloween String Lights, Purple LED, Battery-Powered with Timer
- ✔ String length: 6 feet
- ✔ Lighting: 15 purple LED spider lights
- ✔ Spider size: 3 in H × 3.2 in W
You will finish with lights arranged to highlight the space, attached without putting strain on the electrical cord, and checked after dark. Use low-voltage or plug-in lights according to the manufacturer’s instructions, and keep connections away from standing water.
Difficulty: Beginner | Time: 1-2 hours
What You’ll Need
Tools & Materials:
- Outdoor-rated string lights with the desired color, bulb spacing, and length
- Outdoor-rated extension cord, if needed
- Outdoor-rated hooks, clips, or light-hanging guide wire
- Tape measure
- Pencil or removable marking tape
- Ladder suited to the mounting height
- Optional: timer, outdoor-rated cord cover, and cable ties
Knowledge:
- Basic measuring and ladder use
- Ability to identify an outdoor outlet and follow the light manufacturer’s connection limits
Check that the lights, extension cord, timer, and connectors are rated for outdoor use. Read the packaging for the maximum number of connected strands and any restrictions on covering or joining them. Use an outlet protected by a ground-fault circuit interrupter (GFCI). If you do not have a suitable outlet, ask a qualified electrician to install one; do not run a cord through a window or door that can pinch it.
Brizled 95.14 ft Halloween String Lights, 240 Purple and Orange LEDs
When we want the Halloween colors to carry across a porch, fence, or eaves, Brizled’s 95.14-foot strand is the most capable starting point here. Its 240 purple and orange LEDs provide much more continuous coverage than the six-foot spider string, and eight lighting modes let us shift the display’s feel without changing the hardware. That makes it more adaptable than the C7 set, whose appeal is specifically its warm flickering effect.The built-in timer runs for six hours and switches off for 18, while memory retains the selected mode. Those details make a recurring display easier to manage. The strand is IP44-rated for indoor and outdoor use, and up to three strands can connect for a larger installation. The tradeoff is the corded power: we need an outlet and should protect the adapter from water. Compared with the battery spider lights, Brizled covers more ground but is less convenient for an isolated tree or mailbox.
Pros:
- Long 95.14-foot strand with 240 LEDs
- Eight modes offer different display effects
- Timer and memory help maintain a repeatable schedule
- Connects with up to two additional strands
Cons:
- Corded power limits placement to locations near an outlet
- Power adapter needs protection from water
Best for: Decorators who want long, vivid purple-and-orange coverage with several lighting effects and a recurring timer.
Not ideal for: Anyone decorating far from an outlet or unable to keep the power adapter protected from water.
Bottom line: We recommend Brizled when broad, colorful Halloween coverage matters more than cordless placement.
“We recommend Brizled when broad, colorful Halloween coverage matters more than cordless placement.”
C7 Halloween Flicker Flame String Lights, 25 ft, Black Wire
For a porch or patio where the mood matters more than saturated Halloween color, this 25-foot C7 strand takes a different approach: clear LED bulbs produce a warm, flickering flame effect. The result is a more understated, haunted-house glow than Brizled’s purple-and-orange LEDs. It also looks less like a conventional colored holiday strand, which may suit a display built around pumpkins, skeletons, or other warm-toned decorations.Its 12-inch bulb spacing gives the strand a defined, bulb-by-bulb appearance. The set is described as waterproof and suitable for indoor and outdoor use, and can connect with up to 17 strands, offering far more expansion than Brizled’s three-strand limit. Two spare bulbs are included. We should weigh that flexibility against a corded setup and glass bulbs: the set needs an outlet, and the bulbs call for more care around impacts than an LED string without exposed glass. It is the better mood light, but Brizled is the more obvious choice for colorful coverage.
Pros:
- Warm flickering flame effect creates atmospheric light
- Waterproof and listed for indoor and outdoor use
- Can connect up to 17 strands
- Includes two spare bulbs
Cons:
- Corded power requires access to an outlet
- Glass bulbs need care around bumps and impacts
Best for: Decorators who want warm flickering light for a porch, patio, or haunted-house scene and may expand the installation.
Not ideal for: People who need battery placement, want purple-and-orange Halloween color, or prefer bulbs that are less vulnerable to impacts.
Bottom line: Choose the C7 set when a warm, flickering glow and expandable layout matter more than vivid color or cordless convenience.
“Choose the C7 set when a warm, flickering glow and expandable layout matter more than vivid color or cordless convenience.”
Large Spider Halloween String Lights, Purple LED, Battery-Powered with Timer
These spider lights are best understood as a decorative detail rather than a way to illuminate a whole outdoor space. The 15 purple LED spider shapes sit along a six-foot string, making them a natural fit for a doorway, small shrub, or table display. Their themed shapes make the Halloween intent more immediate than either Brizled’s colored points of light or the C7 set’s flame-like bulbs.Battery power is the key advantage: three AA batteries let us place the strand where a cord would be inconvenient. Its IP65 rating is listed for indoor or outdoor use, and the six-hours-on, 18-hours-off timer reduces routine switching. There is one constant-light mode, though, so it offers less atmosphere control than Brizled’s eight settings and lacks the C7 strand’s flicker. Battery replacement is another ongoing task. Choose it to add a compact spider motif; skip it if we need broad coverage or multiple lighting effects.
Pros:
- Battery-powered for flexible placement
- Spider shapes add a clear Halloween motif
- IP65-rated for indoor or outdoor use
- Timer runs for six hours on and 18 hours off
Cons:
- Six-foot string covers much less area than the other picks
- Only one constant-light mode
- Requires three AA batteries
Best for: Anyone adding a small purple spider accent where corded lights would be awkward to place.
Not ideal for: Decorators who need long-distance coverage, changing modes, or a display that does not rely on replaceable batteries.
Bottom line: We’d use these as a cordless spider-themed accent, not as the main lighting for a large outdoor display.
“We’d use these as a cordless spider-themed accent, not as the main lighting for a large outdoor display.”
As an Amazon Associate we earn from qualifying purchases.
Before You Start
Choose a dry day for installation. Inspect the lights and cords for cracked insulation, bent prongs, loose sockets, or other damage. Do not use damaged equipment. Keep the planned route away from vehicle paths, hot surfaces, sharp edges, moving doors, and places where people could snag the cord.
Plan the full route before climbing. The plug should reach the protected outlet without tension, and every strand connection should remain elevated and sheltered from direct water exposure. Never attach lights to power lines, gutters that cannot bear the load, or tree branches that may move sharply in wind. Do not staple, nail, or pierce a light cord.
Step-by-Step Instructions
Step 1: Choose the area and lighting effect
Walk the area at dusk or use a flashlight to identify the features you want to highlight. Pick one main route, such as a porch roofline, fence, or path edge, and add a smaller accent if the display needs depth. For a spooky effect, use amber, violet, green, or red lights, or mix one color with a few dimmer accents.
Keep lights out of eye level along walkways and away from windows where bright bulbs could shine directly indoors. Leave stairs, handrails, and doorways clear enough to use safely.
Tip: A few defined runs usually read more clearly than a tangled web of lights across the whole yard.
Check: You have a specific route and can name where the lights will start, end, and connect to power.
Step 2: Measure the route and check the power source
Measure each straight section and add the lengths together. Allow a little extra for corners and gentle draping, but avoid buying a strand so long that it must be tightly folded or coiled. Check the outlet location and compare the route with the light strand length and extension cord reach.
Read the strand label for connection limits. If using multiple strands, confirm that the manufacturer’s maximum is not exceeded. Place any timer near the outlet in a dry, protected location, following its instructions.
Tip: Do not plan for a cord or strand to cross a walkway. Reroute the display or use a suitable protected route instead.
Check: The planned lights can reach the outlet without a taut cord, a pinched cable, or a connection resting on the ground.
Step 3: Mark secure attachment points
Mark the positions for hooks or clips along the planned route. Use sturdy building features, fence posts, or a purpose-made light-hanging wire as supports. Space attachment points according to the product instructions and the weight of the strand; add support near corners and connection points.
For a span between distant points, install a suitable guide wire and attach the light strand to it with outdoor-rated clips. The guide wire should carry the span’s weight so the electrical cord does not act as a support cable. Avoid attaching hardware where it could damage wiring or plumbing inside a wall.
Tip: If a support point is uncertain, choose a different route rather than relying on a weak branch, loose trim, or a gutter.
Check: Every planned section has a clear support point, and long spans have support separate from the light cord.
Step 4: Install supports from a stable position
Install the hooks, clips, or guide wire while the lights are unplugged. Use hardware designed for the surface, and follow its installation directions. Set the ladder on firm, level ground; keep your body centered between the rails and move the ladder instead of leaning sideways.
Ask another adult to steady the ladder when appropriate. Do not work from a chair, railing, or improvised platform. If the route requires reaching near overhead electrical lines, stop and choose another route.
Tip: Do not climb while holding the strand. Place materials where you can reach them safely, or have a helper pass them up.
Check: Supports are firmly attached, do not wobble under a gentle hand check, and sit along the measured route.
Step 5: Hang the lights without pulling on the cord
Keep the lights unplugged as you attach them. Start at the end nearest the outlet, then work along the route, clipping the strand to each support. Leave a small, relaxed curve between points rather than pulling the cord tight. Keep bulbs and sockets clear of sharp edges, hot fixtures, and areas where doors or gates move.
Secure extra cord loosely with outdoor-rated ties. Do not twist it tightly around a support or bind it against a surface. Keep plugs and strand connections elevated and sheltered, with any drip loops arranged according to the product instructions so water does not run toward a connection.
Tip: Do not cover connections with plastic bags; trapped moisture and heat can create hazards. Use only a connector cover approved for the product and outdoor use.
Check: The strand hangs evenly, supports carry its weight, and no cord is pinched, stretched, or lying in a puddle-prone area.
Step 6: Connect the display and test it
With the lights still unplugged, join strands only in the way the manufacturer specifies. Connect the set to the outdoor-rated extension cord or timer if used, then plug it into the GFCI-protected outlet. Keep each plug connection raised and sheltered from direct rain, while allowing ventilation around the equipment.
Turn on the lights and walk the route. Check that every section illuminates, the colors look right from the street or viewing area, and the display does not block steps, signs, or the path to the door. Turn the lights off and unplug them before adjusting supports or connections.
Tip: If the GFCI trips, unplug the display and inspect it for damage or wet connections. Do not repeatedly reset the outlet while the cause is unknown.
Check: All planned bulbs light, the route is visible after dark, and cords and connections remain clear of foot traffic.
Step 7: Set the schedule and check the display again
If you use a timer, set the on and off times according to its instructions and test one full switching cycle. Make a final walk-around after dark from the places where guests will approach. Confirm that the lighting marks the route without hiding steps, creating glare, or leaving a cord across the walking surface.
After windy weather or heavy rain, switch off and unplug the display before inspecting the supports, cord, and connections. Take down the lights if a strand becomes damaged or a support loosens.
Tip: Switch the lights off when they are not needed, especially if the manufacturer recommends limited operating hours.
Check: The timer operates as set, the display remains secure, and guests can reach the entrance without stepping over cables.
Common Mistakes to Avoid
- Using indoor-only lights or an indoor extension cord outside. — Check every product label for outdoor use before installation. Replace any item that lacks the needed rating.
- Stretching the strand tightly between supports. — Leave a relaxed curve and add supports or a guide wire for long spans. Do not let the cord carry the weight across a gap.
- Joining too many strands or using an extension cord beyond its rating. — Follow the connection limits printed by the light and cord manufacturers. Use a shorter run or a separate approved outlet when needed.
- Leaving a plug connection on the ground or across a walking route. — Reroute and elevate the connection in a protected position. Keep all cords out of walkways and standing water.
Troubleshooting
Problem: The lights do not turn on.
Solution: Switch off and unplug the set. Check that plugs are fully seated, the outlet has power, and the GFCI has not tripped. Inspect for damage and reconnect only as the product instructions allow. Stop using any damaged strand.
Problem: The GFCI trips when the lights are connected.
Solution: Unplug the lights and check for wet, dirty, or damaged connections. Let wet equipment dry only if the manufacturer permits it, and replace damaged parts. If the outlet trips again with sound, dry equipment, leave it disconnected and contact an electrician.
Problem: A section sags or pulls loose.
Solution: Turn off and unplug the lights before adjusting them. Add a support point or guide wire, and use hardware suited to the mounting surface. Do not tighten the strand until the cord is under tension.
Problem: The display looks too bright or makes the path hard to see.
Solution: Turn off the lights before moving them. Aim bulbs away from eye level, reduce the number of strands, or use a dimmer only if the lights are specifically compatible with it.
What Success Looks Like
The finished display follows the intended route, creates a spooky accent after dark, and has no loose or damaged hardware. Every connected product is rated for outdoor use, the outlet has GFCI protection, and the strand stays within the manufacturer’s connection limits. Plugs and connections are elevated and sheltered, cords do not cross walkways, and the lights turn on and off as planned.
Next Steps
Check the display after strong wind or heavy rain, and switch it off and unplug it before touching or adjusting it. At the end of the season, unplug the equipment, remove the lights without pulling the cord, and inspect each strand before storage. Let equipment dry as its instructions allow, coil it loosely, and store it in a dry place. Replace damaged lights or cords before using the display again.
Frequently Asked Questions
Can I use ordinary indoor string lights outside?
No. Use lights, extension cords, timers, and connection covers marked for outdoor use. Indoor equipment may not be built to handle outdoor moisture or temperature changes.
Can I hang lights from a tree?
You can use a healthy, stable tree as a support if the attachment method does not damage the bark and the strand can move without being pulled tight. Do not use a branch that sways sharply, is dead, or could fall. A separate guide wire can carry the span’s weight.
How many strands can I connect together?
Use only the number allowed by the light manufacturer’s label or instructions. Limits vary by product and bulb type. Do not assume two similar-looking strands have the same limit.
What should I do if rain is forecast?
Use products rated for outdoor conditions and keep connections elevated and sheltered as their instructions direct. If water is pooling near the setup, a connection is exposed, or equipment is damaged, switch off and unplug the display from a dry location if safe, then leave it off until the problem is resolved.
Can I leave the lights on overnight?
Follow the manufacturer’s operating guidance and timer instructions. A timer can limit operating hours. Turn the lights off when they are not needed, and unplug them before inspecting, moving, or storing the setup.
Fall yard work Picks
leaf blowers
As an affiliate, we earn on qualifying purchases.