Creating watercolor wall art is simple and achievable even if you’re not an artist. You just need basic supplies like watercolor paints, brushes, and textured paper, and a willingness to experiment. Focus on techniques like blending colors with wet-on-wet or wet-on-dry methods, and embrace the natural flow of watercolor. Layering colors and textures adds depth, making your artwork stand out. Keep exploring these tips, and you’ll find it easier to craft stunning pieces for your space.
Key Takeaways
- Use simple watercolor techniques like wet-on-wet for easy, dreamy effects suitable for beginners.
- Choose textured or smooth paper to influence how colors blend and create interesting visual effects.
- Focus on color blending and layering to add depth without needing perfect brushwork.
- Keep supplies minimal and experiment freely—perfection isn’t necessary for beautiful wall art.
- Frame and display your finished pieces to easily personalize your space with minimal effort.

Have you ever wondered how to transform a plain wall into a mesmerizing focal point? One of the simplest and most captivating ways to do this is by creating watercolor wall art. You don’t need to be a professional artist to achieve stunning effects—just a little patience and some basic supplies can turn your space into a gallery. The key to making watercolor art stand out lies in understanding how to effectively use color blending and paper textures, both of which you can explore even with minimal experience.
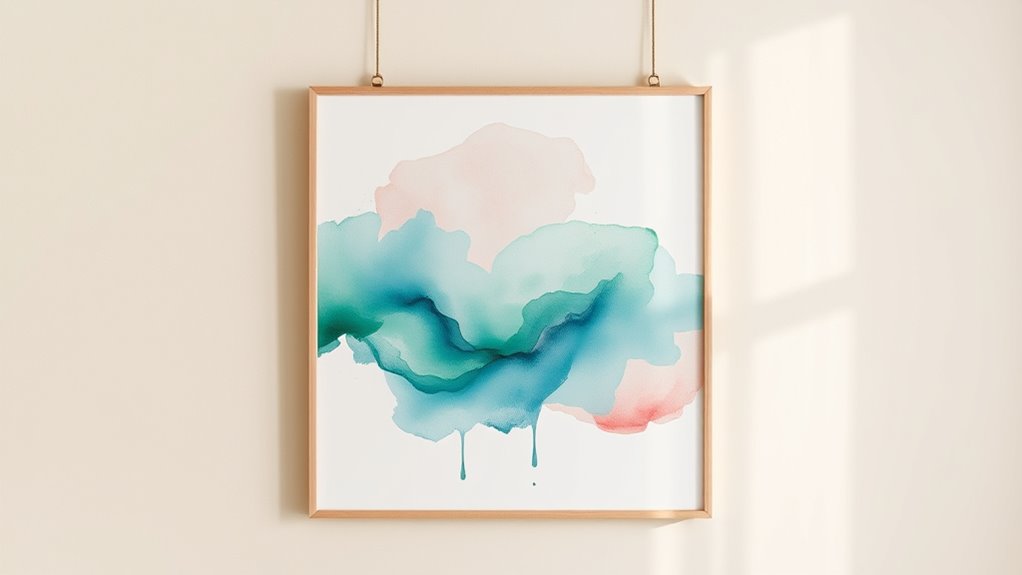
Color blending is what gives watercolor art its signature softness and fluidity. Instead of harsh lines, colors merge seamlessly into one another, creating a dreamy or vibrant effect depending on your preferences. To master this, start by choosing a few colors you love and applying them on damp paper. As the paint spreads, it naturally blends, producing beautiful gradients without much effort. You can experiment with different techniques, like wet-on-wet, where you add paint onto wet paper, or wet-on-dry for sharper edges. The beauty of watercolor is that it encourages a forgiving approach—if your colors don’t blend exactly how you want, you can always layer or add more water to soften the transitions. This technique allows even beginners to achieve professional-looking results. Additionally, understanding how techniques and materials influence the final look can help you refine your style over time.
Master color blending with wet-on-wet techniques for dreamy watercolor effects.
Paper textures also play an essential role in elevating your watercolor wall art. Smooth, hot-pressed paper offers a sleek appearance with sharp details, ideal for delicate line work or precise shapes. However, if you’re aiming for more organic, spontaneous effects, rougher or cold-pressed paper is your best choice. The textured surface interacts with the paint differently, creating interesting patterns and adding depth to your piece. When you incorporate paper textures into your artwork, you fundamentally add another layer of visual interest. You can even experiment with tearing or embossing the paper before painting to create unique textures that add character to your wall art.
Getting started is straightforward. Pick up some watercolor paints, a variety of textured papers, and a few brushes. Don’t worry about making perfect shapes or lines—embrace the natural flow of the paint and textures. Layer colors, watch them blend and bleed, and play with the surface textures to see how they influence your artwork. Once you’re satisfied, simply frame your creation and hang it on your wall. Before you know it, your space will be adorned with a personalized piece of art that looks professionally crafted but was surprisingly easy to produce. With a little practice, you’ll find watercolor wall art becomes an enjoyable, rewarding way to refresh any room.
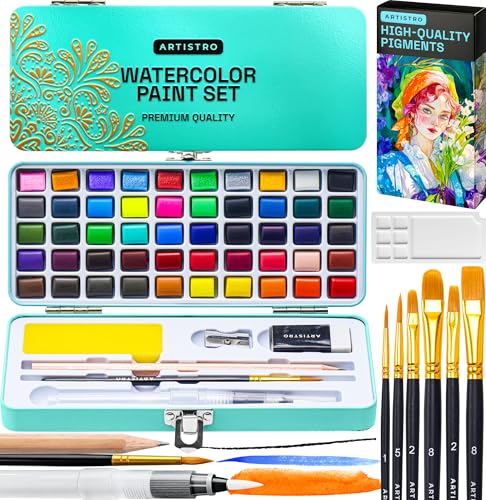
ARTISTRO 50 Color Watercolor Paint Set – Portable Paint Art Kit with Palette and Brush Pens – Travel Water Color Set for Adults, Professionals, Kids – Art and Painting Supplies – Gift Idea
EXPLORE ENDLESS COLOR: This set includes 50 richly pigmented watercolor pans for endless artistic combinations. The set is…
As an affiliate, we earn on qualifying purchases.
As an affiliate, we earn on qualifying purchases.
Frequently Asked Questions
What Types of Watercolor Supplies Are Best for Beginners?
When choosing watercolor supplies, you want the best brushes like round and flat brushes for versatility, and watercolor paper types such as cold-pressed paper for its durability and texture. These supplies help you get started easily, even if you’re new to watercolor. Stick with good quality but affordable options, and you’ll find it easier to learn and enjoy creating beautiful art without feeling overwhelmed.
How Do I Choose the Right Colors for My Wall Art?
You might think choosing colors is overwhelming, but it’s easier than you think. Focus on color harmony; pick colors that complement each other to create a balanced look. Consider the mood you want to evoke—calm, energetic, cozy—and select shades accordingly. Trust your instincts, start with a small palette, and experiment. This approach helps your wall art look intentional and beautiful, even if you’re new to watercolor.
Can I Fix Mistakes in Watercolor Paintings Easily?
Mistake correction in watercolor paintings can be tricky but isn’t impossible. You can try watercolor repair techniques like lifting paint with a damp brush or blotting to fix errors. If the mistake is stubborn, you might layer more paint to cover it or wait for it to dry and paint over it carefully. Remember, patience is key, and practicing these watercolor repair methods helps you improve your skills and avoid future mistakes.
How Long Does It Typically Take to Create Watercolor Wall Art?
Creating watercolor wall art varies depending on your skill and the complexity of your design. Typically, it takes anywhere from a few hours to several days. To stay on track, focus on good time management and break the creative process into manageable steps. Rushing can affect quality, so plan your sessions. With patience, you’ll enjoy the process and end up with beautiful artwork you can be proud of.
Are There Digital Tools to Help Design Watercolor Wall Art?
While creating watercolor wall art by hand is rewarding, digital tools make it easier and more accessible. You can use design software with digital brushes that mimic watercolor textures, giving you control and flexibility. These tools help you experiment with colors, shapes, and compositions without mess or waste. Even if you’re a beginner, digital watercolor design lets you craft stunning wall art quickly and confidently, transforming your ideas into beautiful decor.

Prudiut 25 Sheets Cotton Watercolor Paper, 300 GSM, 4 x 6 inch, White, Textured, Deckled Edge, Ideal for Watercolors, Wedding Invitations, Cards, Crafts
【What You Will Receive】You will receive 25 sheets of handmade textured paper measuring 4 x 6 inches, paper…
As an affiliate, we earn on qualifying purchases.
As an affiliate, we earn on qualifying purchases.
Conclusion
So, don’t hesitate to plunge into watercolor wall art—it’s like painting your own personal rainbow on your walls. Even if you’re not an artist, these simple techniques make creating stunning pieces feel as easy as splashing a little color here and there. Remember, your wall is a blank canvas waiting for your unique touch. With a little practice, you’ll turn your space into a vibrant garden of creativity that blooms with every brushstroke.
FENORKEY Artist Watercolor Paint Brushes, Round Pointed Tip Paint Brushes Set, 12pcs Different Sizes Detail Paint Brush for Watercolor, Acrylics, Ink, Gouache, Oil, Tempera (Brown)
【Sturdy】These watercolor brushes feature premium aluminium crimped ferrules to secure the bristles, treated to prevent shedding. The lacquered…
As an affiliate, we earn on qualifying purchases.
As an affiliate, we earn on qualifying purchases.

Soucolor Art Supplies, 192-Pack Deluxe Art Set Drawing Painting Supplies Kit with Acrylic Pad, Watercolor Pad, Sketch Book, Canvases, Acrylic Paint, Crayons, Pencils, Gifts for Artist Adults Teen Kids
【Complete ALL-IN-ONE Deluxe Wooden Art Box】Soucolor 192-pack Deluxe Art Set includes a wide range of art supplies: 60…
As an affiliate, we earn on qualifying purchases.
As an affiliate, we earn on qualifying purchases.